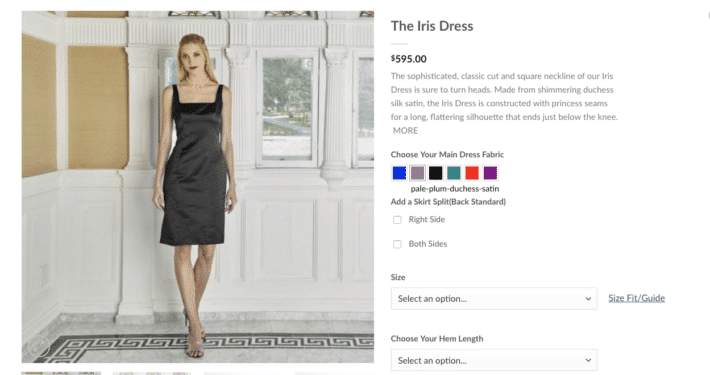


Les possibilités d'une boutique WooCommerce sont quasi infinies : tout ce que vous souhaitez vendre est possible. Dans ce tutoriel, nous aborderons la forme la plus simple du e-commerce en nous attaquant aux produits physiques WooCommerce. Découvrez comment ajouter de nouveaux articles physiques à votre boutique, directement sur Bright Vessel !
Dans notre série de tutoriels WooCommerce, nous avons pour objectif d'aider les propriétaires de boutiques en ligne à gérer leur activité. WooCommerce est un outil puissant et très simple d'utilisation pour créer et gérer une boutique en ligne. Chez Bright Vessel, nous nous engageons à accompagner nos clients dans l'utilisation de la plateforme.
Nous allons suivre ce tutoriel WooCommerce sur les produits physiques avec un équivalent pour les produits virtuels. C'est parti !
Voici ce dont vous aurez besoin pour suivre ce tutoriel sur les produits physiques WooCommerce :
Vous constaterez que la configuration est relativement similaire à celle de l'interface WordPress, vous aurez donc l'impression d'écrire un nouvel article. Vous pouvez ajouter votre premier produit physique WooCommerce en cliquant sur Produits > Ajouter. Voici les premiers éléments à spécifier :
Vous disposez désormais des informations essentielles concernant le premier produit de votre boutique en ligne. Il est temps d'accéder à la méta-boîte « Données produit », où nous allons passer à l'action.
En incluant les produits physiques WooCommerce, vous pouvez choisir parmi quatre types de produits :
Pour ce tutoriel, nous travaillerons avec un produit simple.
Dans l'onglet Général des Données produit, vous pouvez ajouter :
Dans l'onglet Inventaire, vous pouvez :
Dans l'onglet Expédition, vous pouvez :
Si vous ajoutez un produit à la classe Articles lourds, des frais supplémentaires seront facturés aux clients lors du paiement et les frais de port augmenteront.
L'onglet « Produits liés » permet d'ajouter des articles similaires à la page d'un produit. Ainsi, les clients potentiels peuvent consulter d'autres produits susceptibles de les intéresser. Vous devez configurer cette option pour chaque article que vous souhaitez lier à un autre, car ce paramètre ne crée pas de lien entre eux.
Pour utiliser les produits liés, vous devez avoir plus de deux produits sur votre boutique en ligne. Cette fonctionnalité peut être utilisée de trois manières :
L'onglet Attributs vous permet de sélectionner les caractéristiques spécifiques des produits physiques WooCommerce. Vous pouvez choisir autant de caractéristiques que nécessaire pour votre produit. Voici comment ajouter chaque attribut :
Vous pouvez ajouter autant de termes pertinents que nécessaire pour votre produit. Les attributs sont des classifications ; lorsque vous souhaitez les spécifier, privilégiez les termes applicables.
Il est possible d’ajouter de nouvelles taxonomies en sélectionnant Attribut de produit personnalisé avant de cliquer sur Ajouter.
Ce que vous pourrez faire dans l'onglet Avancé de vos produits physiques WooCommerce :
Maintenant que vous avez configuré vos données produit, il est temps de décrire les produits physiques WooCommerce.
À ce stade, vous pouvez consulter votre produit sur le site et constater qu'il est complet, avec son prix, sa catégorie et une brève description. Vous pouvez consulter ses caractéristiques en cliquant sur « Informations complémentaires ».
Maintenant que vous savez comment ajouter un produit simple, créer un produit affilié devrait être un jeu d'enfant. Lors de la création, choisissez Externe/Affilié plutôt que Simple. Vous pourrez désormais créer des liens vers des produits que vous ne vendez pas sur votre boutique en ligne, mais via des liens d'affiliation.
Utilisez les produits d’affiliation pour les produits sponsorisés ou si vous avez choisi de vendre un article particulier via un autre site pour des raisons de commodité.
Lorsque vous sélectionnez Eternal/Affiliate comme type de produit :
Vous pouvez désormais créer des produits physiques WooCommerce et les configurer précisément selon vos besoins. Vous souhaitez offrir une expérience client plus complète, incluant également du contenu numérique ? Restez connectés pour notre prochain tutoriel. Section Tutoriels WooCommerce .
Chez Bright Vessel, nous nous sommes engagés à éduquer nos clients sur les meilleures pratiques WooCommerce . En savoir plus sur notre Gestion de boutique WooCommerce services.

"*" indique les champs obligatoires

"*" indique les champs obligatoires

"*" indique les champs obligatoires
Laisser un commentaire
Tu dois être connecté pour poster un commentaire.