Au cours des années qui ont suivi son lancement, WooCommerce est devenu l'un des plugins e-commerce les plus populaires. Open source, facile à comprendre et hautement personnalisable, on comprend aisément pourquoi il est si apprécié. Pourtant, au début, cela peut paraître intimidant. C'est pourquoi nous avons préparé notre premier tutoriel WooCommerce de base : pour vous montrer les ficelles du métier !
Que vous souhaitiez vous lancer dans le e-commerce ou créer un site web de A à Z, vous aurez besoin de conseils. Investir dans l'argent peut sembler intimidant, mais WooCommerce est parfaitement sécurisé. Dans tous les cas, découvrons ce tutoriel WooCommerce et mettons-le en pratique !
Exigences
Pour passer par là Tutoriel WooCommerce, vous aurez besoin de deux choses :
- Un site Web WordPress.
- Accès administrateur au site Web en question, pour installer et gérer les plugins.

Tutoriel WooCommerce : Installation
La première étape de ce tutoriel WooCommerce est simple : installer l'extension ! Voici les étapes :
- Accédez à l’écran Plugins sur WordPress, que vous pouvez trouver à partir du tableau de bord.
- Activez le plugin WooCommerce.
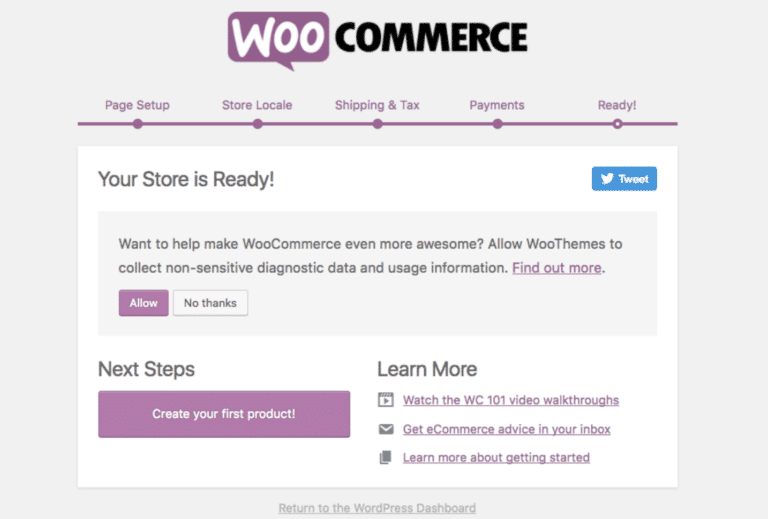
- Installez les pages de la boutique WooCommerce. Une fois le plugin activé, un assistant vous guidera pour installer ces pages, notamment la page principale de la boutique et celle du panier.
- Cliquez sur Installer les pages WooCommerce.
- Suivez les étapes jusqu'à la fin.

Vous accéderez ensuite à l'écran d'accueil. Vous remarquerez deux nouveaux éléments dans le menu d'administration de WordPress, à gauche : WooCommerce et Produits. Pour la suite de ce tutoriel WooCommerce, vous utiliserez le premier élément.
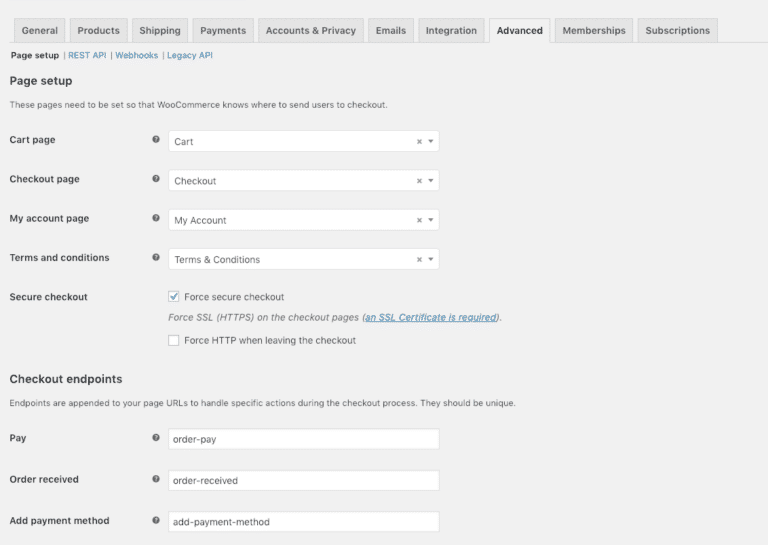
Révision des pages WooCommerce
Bien que l'installation ait dû ajouter les pages WooCommerce pertinentes, il est essentiel de vérifier qu'elles apparaissent dans la navigation. Voici comment vérifier leur bon fonctionnement :
- Accédez à votre tableau de bord WordPress.
- Accédez à l’écran Apparence > Menus.
- Choisissez les pages WooCommerce que vous souhaitez intégrer à votre site. Parmi les pages les plus populaires, on trouve la Boutique, le Paiement, le Panier, un lien vers la page d'accueil et Mon Compte.
- Ajoutez les pages que vous avez choisies.
- Vérifiez que les pages fonctionnent correctement sur le site en ligne. En naviguant, vous devriez trouver, par exemple, une page Boutique vide.
Pour modifier vos pages attribuées, ajoutez ceci après votre domaine : /wp-admin/admin.php?page=wc-settings&tab=advanced
Configuration de WooCommerce
Maintenant que votre e-commerce fonctionne correctement, il est temps de le personnaliser. Comme vous pouvez l'imaginer, c'est la partie la plus complexe du tutoriel WooCommerce. Nous l'avons divisée en trois sous-sections : paramètres généraux, paramètres produits et paramètres de taxation.
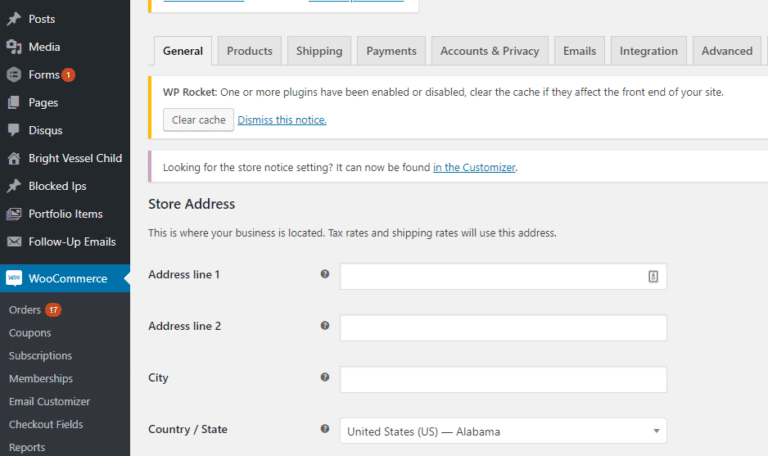
Paramètres généraux
- Accédez à WooCommerce > Paramètres sur votre tableau de bord WordPress.
- Sélectionnez l’onglet Général.
- Ajoutez le lieu d'implantation et le lieu d'exploitation du magasin. Par exemple, si vous êtes aux États-Unis et que vous vendez aux États-Unis et au Canada, c'est ici que vous le précisez. Vous pouvez également choisir de vendre dans le monde entier.
- Sélectionnez la devise que vous utiliserez pour vos ventes. Idéalement, ajoutez ici la devise de votre pays.
- Une fois que vous avez personnalisé les paramètres généraux, cliquez sur Enregistrer les modifications.
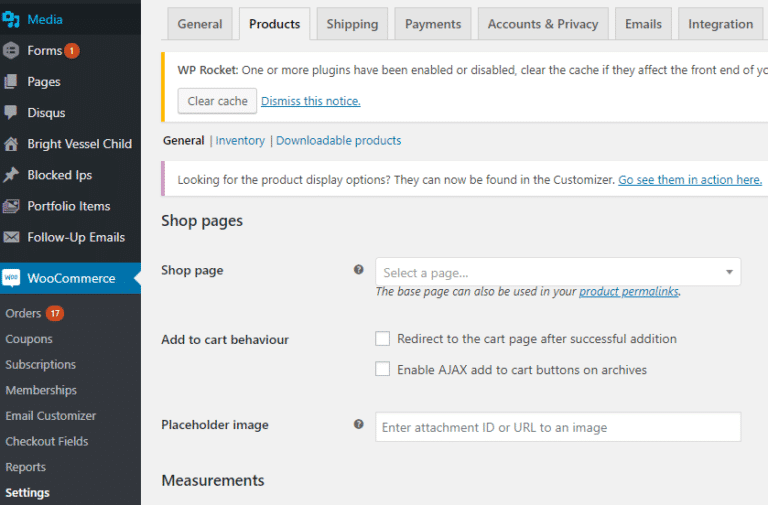
Paramètres du produit
La première chose à faire est d'aller dans WooCommerce > onglet Produits sur votre tableau de bord WordPress. Cet onglet comporte deux onglets plus petits : Options produit et Stock. Commençons par les Options. Voici ce que vous y trouverez :
- La page Archives produits/Boutique est l'endroit où vous trouverez la page principale de la boutique. WooCommerce la définit par défaut comme Boutique, affichant automatiquement vos produits. Cependant, si ce n'est pas ce que vous souhaitez, vous pouvez créer une autre page.
- Le menu déroulant « Affichage de la page Boutique » vous demandera ce que vous souhaitez afficher : produits, catégories de produits ou les deux. Nous recommandons l'option « Afficher les deux ».
- L'affichage par défaut des catégories vous permet de sélectionner l'apparence des pages de catégories. Vous pouvez choisir d'afficher les produits, les sous-catégories ou les deux.
- Le menu de tri par défaut des produits vous permet de choisir la présentation de vos produits. Vous pouvez les afficher par popularité, note, date de publication et prix. Les utilisateurs peuvent également les trier comme ils le souhaitent.
- La section « Ajouter au panier » vous permet de spécifier si vous utiliserez AJAX et si les visiteurs accéderont à leur panier après avoir ajouté des articles. Nous vous recommandons de ne pas rediriger vers le panier, car certains clients pourraient trouver cela intrusif. Laissez-les plutôt ajouter autant d'articles qu'ils le souhaitent et passez manuellement au paiement.
- Dans la section Données produit, vous pouvez choisir vos unités de poids et de dimensions préférées. C'est également là que vous pouvez choisir le mode d'évaluation.
- Dans la section « Taille des images », vous pourrez spécifier les dimensions des images sur chaque page produit et sur les fiches produits. Il est important de connaître les tailles d'images que vous utiliserez, car WordPress les enregistrera automatiquement à ces dimensions. N'oubliez pas que si vous effectuez des modifications après avoir importé des images, vous devrez régénérer les vignettes.
- Dans la section Produits téléchargeables, vous pouvez gérer le comportement de vos visiteurs lors des téléchargements. Si vous publiez du contenu téléchargeable sur votre site WooCommerce, vous pouvez autoriser les visiteurs à y accéder pendant le traitement des paiements. Vous pouvez également obliger les visiteurs à se connecter pour télécharger du contenu.
- Une fois que vous avez personnalisé les paramètres du produit, cliquez sur Enregistrer les modifications.
Accédez maintenant au sous-onglet « Options d'inventaire », où vous pourrez choisir la façon dont vous souhaitez gérer vos stocks. WooCommerce gère ainsi les stocks pour vous.
- WooCommerce peut vous avertir si vous manquez d’un produit spécifique.
- Vous pouvez masquer les articles lorsqu’ils sont en rupture de stock ou informer les visiteurs que l’article est actuellement indisponible.
- À partir de là, il est possible d’afficher les niveaux de stock, afin que les visiteurs sachent s’il ne reste pas beaucoup d’articles.
Paramètres fiscaux
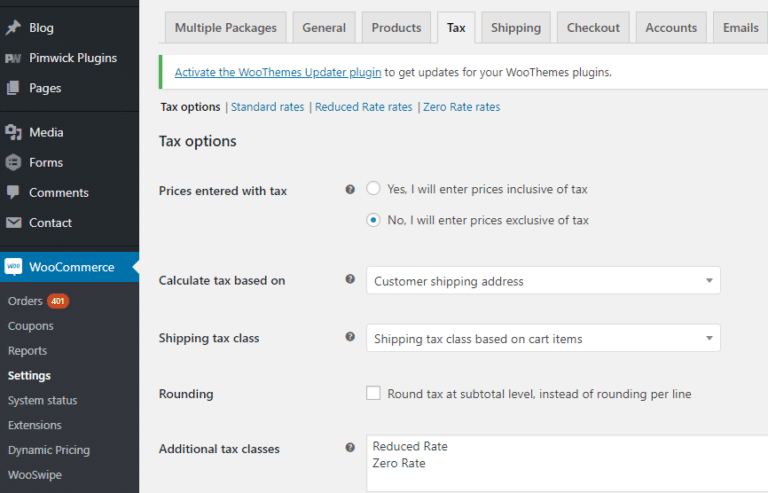
L'onglet « Taxes » comporte quatre sous-onglets : Options fiscales, Taux standard, Taux réduits et Taux zéro. Voici quelques-unes des options disponibles dans cet écran :
- Dans la section « Prix avec taxes », vous pouvez choisir d'inclure ou d'exclure les taxes. Gardez à l'esprit que de nombreux acheteurs trouvent désagréable de penser qu'un article coûte un certain prix et qu'il est ensuite facturé des taxes inattendues. Cependant, si vous vendez dans différents États ou pays avec des réglementations fiscales différentes, la meilleure solution est de ne pas inclure les taxes et de laisser le e-commerce calculer les taux pour vous.
- Sur Tax Based On, vous pouvez calculer le taux d'imposition de votre site : à votre adresse ou à celle de vos clients. Le choix dépend du régime fiscal sous lequel vous travaillez.
- Si vous vendez des articles soumis à des taxes d'expédition, vous pouvez préciser leur mode de calcul dans la section « Catégorie de taxe d'expédition ». Vous pouvez utiliser un taux fixe ou nul, le baser sur les produits expédiés, ou même créer une nouvelle catégorie d'expédition dans la section « Catégories de taxe supplémentaires ».
- Les classes de taxes supplémentaires vous permettent d'ajouter des classes de taxes non prises en compte par WooCommerce. Vous devrez ensuite ajouter les codes pays et les taux correspondants à chacune de ces nouvelles taxes.
- L'option Afficher les totaux de taxes vous permet de spécifier comment vous souhaitez que les différentes taxes apparaissent : individuellement ou dans leur ensemble.
- Une fois que vous avez personnalisé les paramètres des options fiscales, cliquez sur Enregistrer les modifications.
Vous pouvez maintenant accéder au sous-onglet « Taux standard ». Vous y trouverez tous les pays ou États où vous vendrez, afin que WooCommerce puisse calculer les taux de taxe pour chacun d'eux.
- Cliquez sur le lien correspondant au code de chaque lieu et ajoutez-le au champ Code pays.
- Accédez au champ Taux % et saisissez le taux de taxe pour chaque lieu.
- Vérifiez si le taux de taxe s'applique également aux frais de livraison. Si c'est le cas, cochez la case correspondante.
- Une fois que vous avez ajouté tous les taux de taxe et indicatifs régionaux pertinents, cliquez sur Enregistrer les modifications.
Si vous vendez des produits non taxés, accédez au sous-onglet « Taux zéro ». Vous pouvez y ajouter le code pays où le taux zéro s'appliquera, en saisissant 0 % dans le champ « % du taux ».
Pour résumer
Grâce à ce tutoriel WooCommerce, vous avez fait vos premiers pas dans la création d'une boutique en ligne. Vous avez configuré vos paramètres généraux, produits et taxes. Restez à l'affût ! Blog Bright Vessel pour trouver plus de tutoriels !
Bright Vessel est spécialisé dans la création et la gestion de sites web WordPress depuis de nombreuses années. Nous sommes convaincus que notre vaste clientèle est éloquente, car nous avons créé d'excellentes solutions sur mesure pour chacun d'eux. Découvrez nos services ou Contactez-nous pour découvrir comment nous pouvons travailler ensemble.




Laisser un commentaire
Tu dois être connecté pour poster un commentaire.